Achievement Unlocked
Lang verschollenen Tux gefunden
Der Geist der CLT2026 lebt! 🐧✨
Sometimes computer archaeology catches up with you faster than you’d like. In my case, it was my mother’s computer (“MuttiLinux”)—a rock-solid machine powered by an MSI PH67A-C43 (B3) motherboard (internal model MS-7673) and an Intel Core i5-2500K (“Sandy Bridge”). The system had been running Linux smoothly for years, but on the firmware side, it was effectively frozen in time: BIOS version 2.70 from 2012.
Because newer Linux kernels and modern graphics cards run significantly better with proper UEFI support and up-to-date firmware, the decision was made: the final BIOS update to version 6.20 had to be installed. However, this version leap is anything but a routine update—and getting there gave me a genuine 30-minute heart-stopping moment.
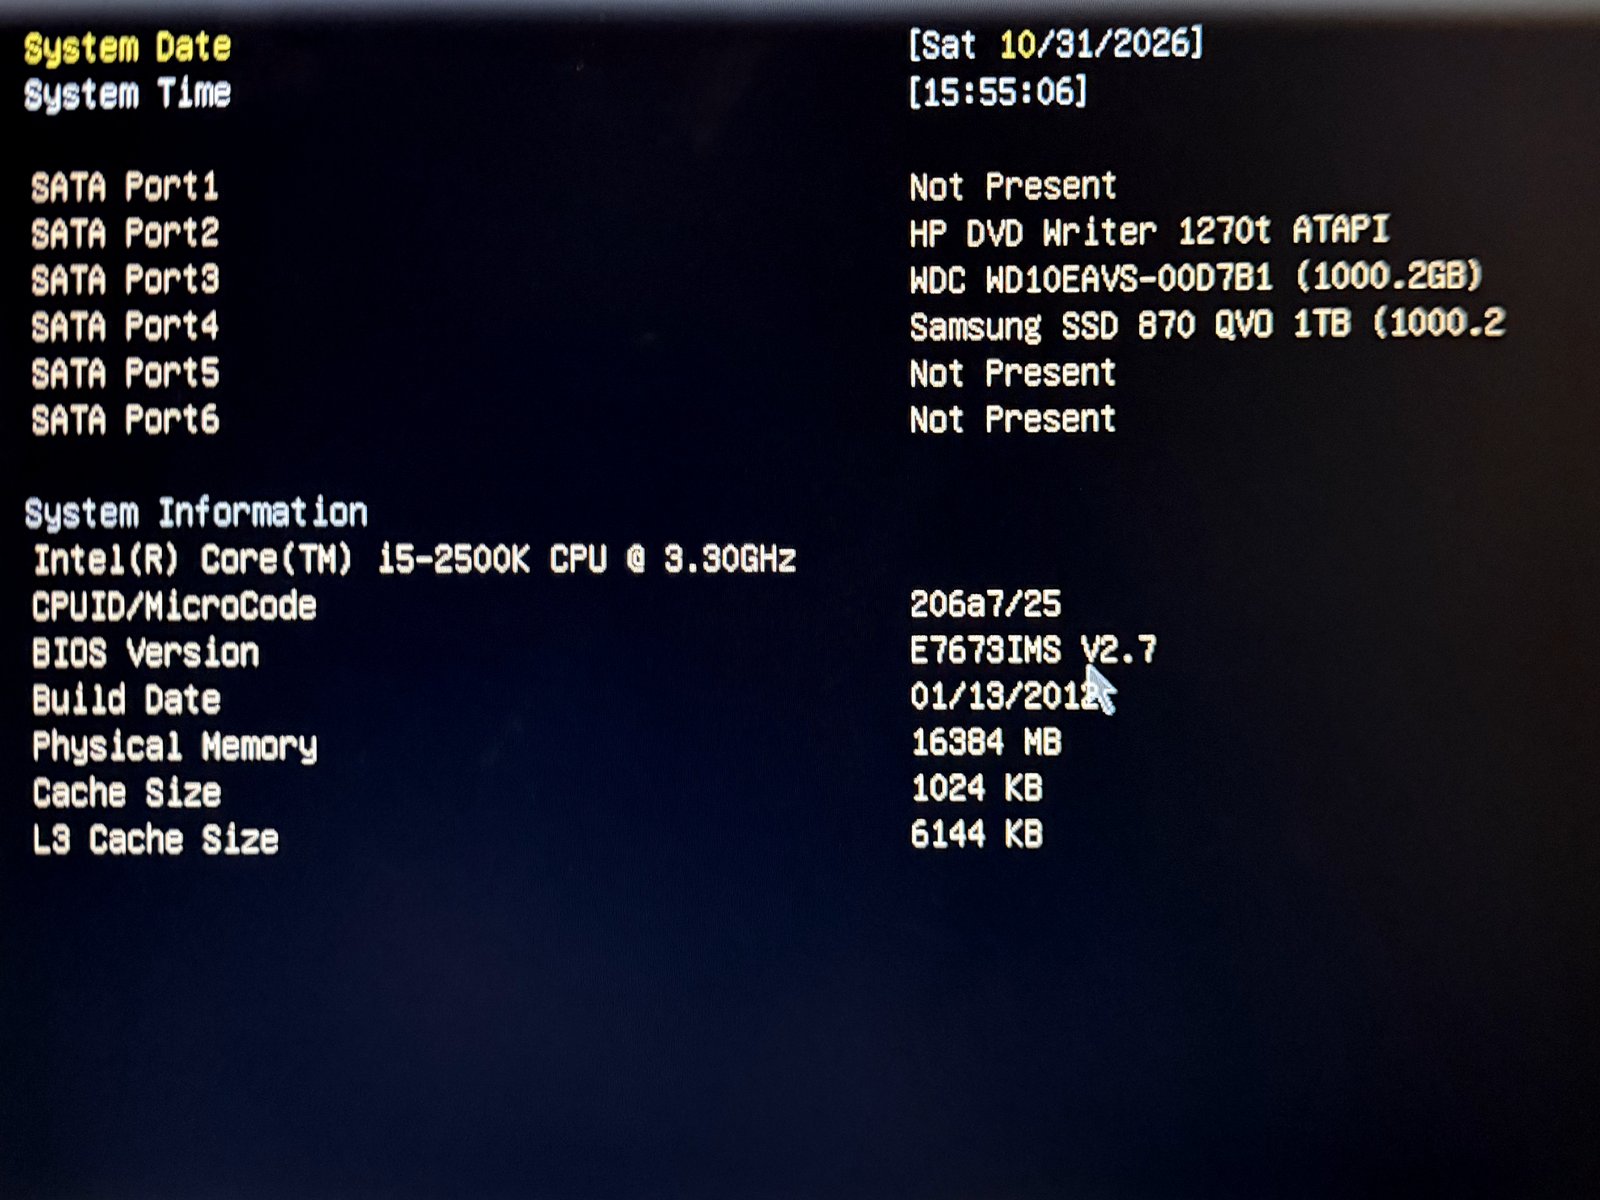
When looking up BIOS updates for MSI’s 6-series boards (P67/H67/Z68), jumping from version 2.x to 6.x doesn’t offer a standard .rom or .bin file for the built-in M-Flash utility. Instead, MSI only provides a Windows executable: E7673v62.exe. The technical reason behind this: starting with version 6.x, MSI upgraded from Intel Management Engine 7 (ME7, 1.5/5 MB) to Intel Management Engine 8 (ME8, 8 MB) to support 22nm Ivy Bridge processors. This transition requires repartitioning the SPI flash chip in two separate stages.
As a Linux user, I prefer not having to install Windows just to flash a motherboard BIOS. So, I contacted MSI Tech Support beforehand asking for a raw image file:
MSI Tech Support:
“Unfortunately, we cannot provide a pure bin file, because we cannot ensure that the ME version will be updated properly. You can create a DOS-bootable USB drive and run the EXE file from there.”
Fair enough—that sounded completely reasonable. Since an MS-DOS license isn’t something most people have lying around in 2026, I followed up with the crucial question:
My question to support:
“Good evening, is this tool FreeDOS compatible? Thank you for your feedback.”
The reply arrived promptly—short, dry, and oozing confidence:
MSI Tech Support:
“Yes, it is.”
Armed with this apparent green light, I got to work.
I grabbed a trusty old USB stick (128 MB is more than enough for DOS) and downloaded the official FreeDOS 1.4 Lite USB image (FD14LITE.img). The image was written to the drive using dd.
Because MSI’s flasher needs to unpack temporary files during execution, I did some quick spring cleaning on the 32 MB FAT partition:
PACKAGES/ folder (FreeDOS package repository) and SETUP.BAT to free up over 20 MB of disk space.E7673v62.exe directly into the root directory.FDAUTO.BAT so the stick boots directly into the C:\> DOS prompt without delay.I plugged the stick into a rear USB 2.0 port on the MSI motherboard, pressed F11 at boot, and FreeDOS appeared on screen in a fraction of a second at C:\>.
Confidently, I launched the update utility:
C:\>E7673V62
Right away, the wrapper started throwing unexpected output:
remove temporary files..CHDIR failed for '..'.
. ok
-- MSI BIOS UPDATE -- Ver: 1.10
Checking model name... ok
Checking PCB version... ok
Checking BIOS version... ok
model name : MS-7673
current version : 2.70
new version : 6.20
Extracting files..CHDIR failed for '..'.
..
.. ok
CHDIR failed for 'XDXWRXGM'
Do you want to update your BIOS ?
Press (Y) to continue updating BIOS.
Press (N) to cancel.
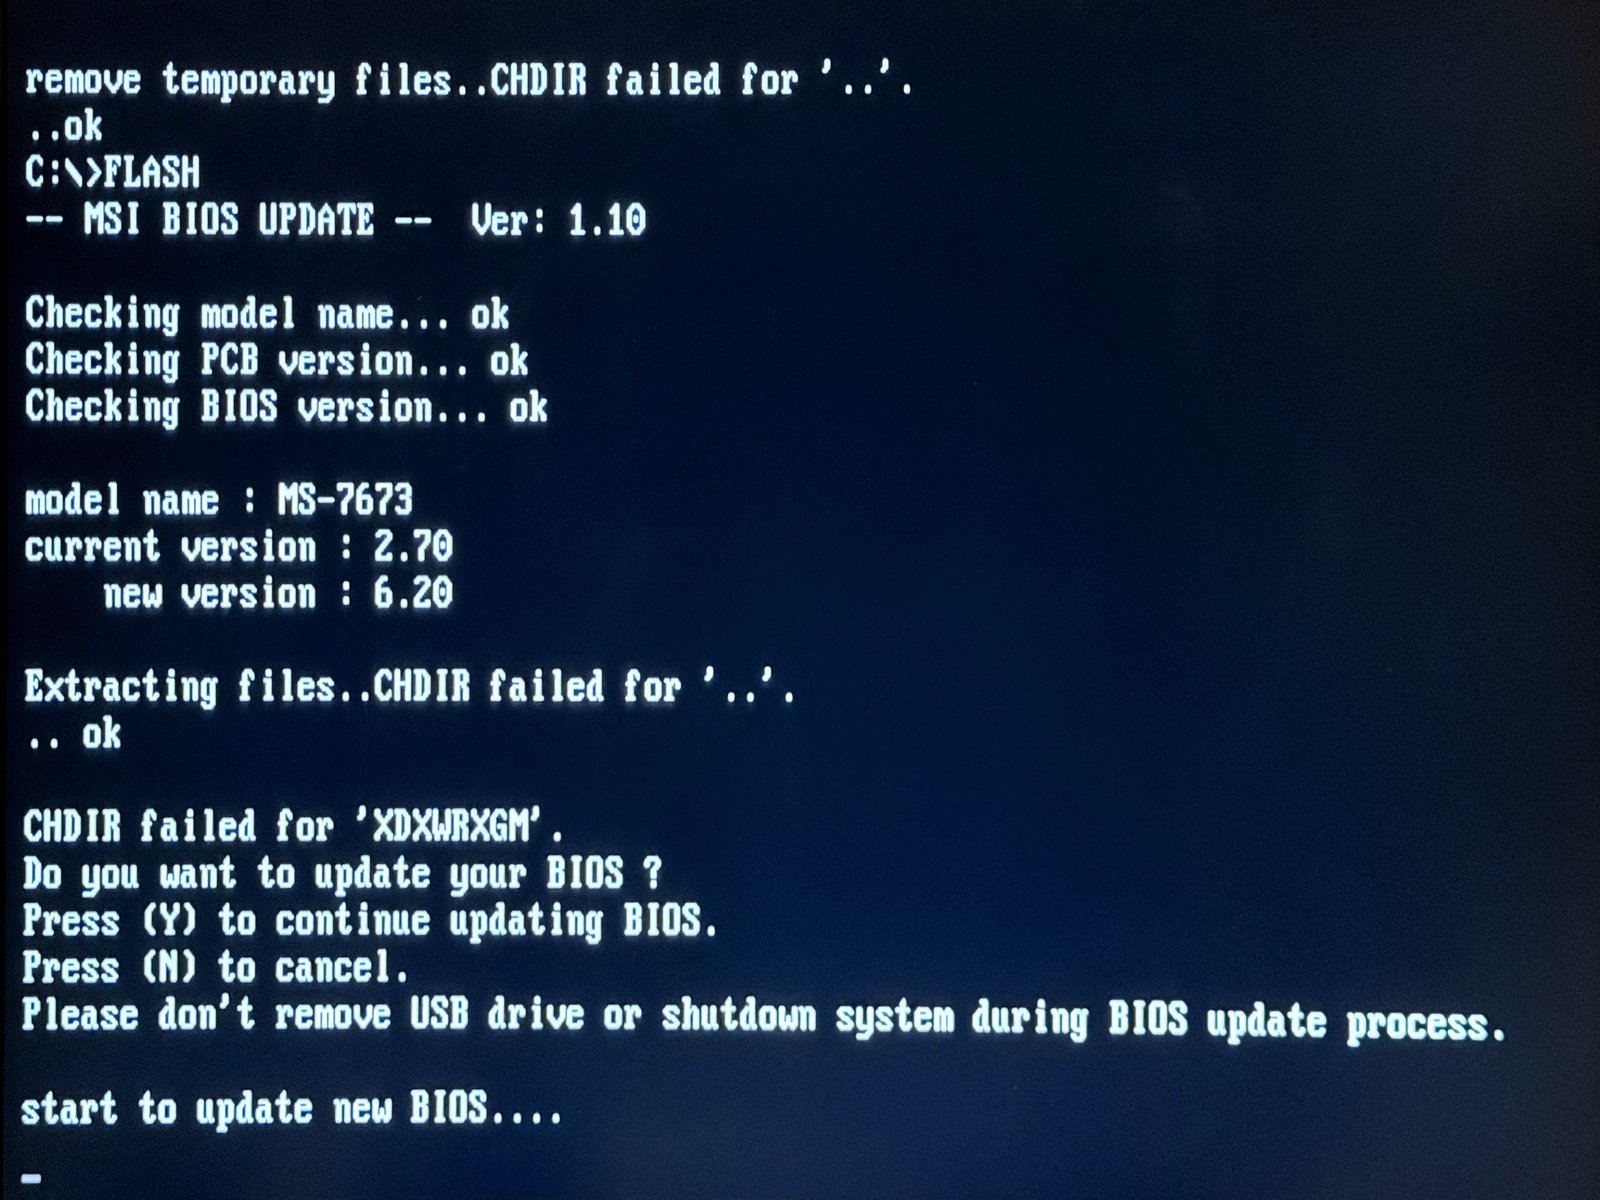
A few unsightly CHDIR failed lines appeared, but the tool reported ok on everything else, correctly identified the motherboard model and current firmware, and asked for confirmation.
I pressed Y. The screen acknowledged:
Please don't remove USB drive or shutdown system during BIOS update process
start to update new BIOS....
And then: absolute silence.
No blinking cursor. No hard drive activity LED. No further console output.
One minute passed. Then five. At fifteen minutes, a bead of cold sweat started forming. After thirty minutes of dead silence, it was unmistakable: the system was completely frozen.
Anyone who has ever flashed a BIOS knows that sinking feeling in the pit of your stomach: “If I turn this machine off right now, I might be left with a 15 kg paperweight.”
Before frantically pulling the power cord, it was time to analyze what had actually happened.
Looking into how AMI AFUDOS (the actual flashing tool executed in the background by MSI’s EXE) operates brought immediate relief: AFUDOS only begins erasing and programming the chip after displaying the following lines on screen:
Reading flash .........
Erasing flash .........
Writing flash .........
Because the display had frozen right at start to update new BIOS...., the utility had crashed before initiating any write operations. The existing BIOS chip was completely untouched!
HIMEMX vs. AFUDOS
End of heading.
So why did it freeze?
In its default configuration (FDCONFIG.SYS), FreeDOS loads the XMS memory manager HIMEMX.EXE, while FDAUTO.BAT loads the UHDD.SYS disk caching driver and moves DOS into high memory using DOS=HIGH,UMB.
AMI AFUDOS, however, requires direct, unfiltered hardware access to CPU registers and System Management Mode (SMI). As soon as AFUDOS attempted to switch into protected or unreal mode, it collided with HIMEMX’s A20 gate handler. The result: an instant, silent CPU deadlock.
On top of that, MSI’s wrapper was attempting to change directories via system("cd XDXWRXGM") inside child shells—which fails under FreeDOS’s FreeCOM shell and produced the confusing CHDIR failed messages.
After powering the PC off and confirming that it rebooted unharmed into BIOS 2.70, I reconfigured the USB drive for a true clean boot:
FDCONFIG.SYS
End of heading.
Every single memory driver was eliminated. DOS now runs strictly in unadulterated Real Mode below 640 KB:
!COUNTRY=001,858:\FREEDOS\BIN\COUNTRY.SYS
!LASTDRIVE=Z
!BUFFERS=20
!FILES=40

DOS=LOW
SHELL=\FREEDOS\BIN\COMMAND.COM \FREEDOS\BIN /E:2048 /P=\FDAUTO.BAT
FDAUTO.BAT
End of heading.
No UHDD.SYS, no disk caching, no resident services—just the search path and a welcoming banner:
@echo off
SET DOSDIR=\FREEDOS
SET PATH=%dosdir%\BIN;.
SET DIRCMD=/P /OGN /Y

echo.
echo ====================================================
echo  MSI MS-7673 BIOS Update (Clean Real-Mode DOS)
echo.
echo  Command to start the update:
echo      FLASH
echo ====================================================
echo.
Instead of relying on the fragile cd routines of MSI’s wrapper EXE, I extracted the core components directly from the package:
AFUDOS.EXE (AMI Flash Utility v2.38)E7673IMS.620 (the complete 8 MB BIOS image)Both files were placed directly in the root directory of the USB drive. I then created a small FLASH.BAT script that invokes AFUDOS with MSI’s exact parameters:
@echo off
echo Starting BIOS update for MSI MS-7673 (v6.20)...
echo.
AFUDOS.EXE E7673IMS.620 /p /b /n /k /x
(Parameter breakdown: /p = Program Main BIOS, /b = Program Boot Block, /n = Program NVRAM, /k = Program Non-Critical Blocks, /x = Bypass ROM ID check).
USB drive plugged back in, machine booted—and the new clean prompt greeted me immediately.
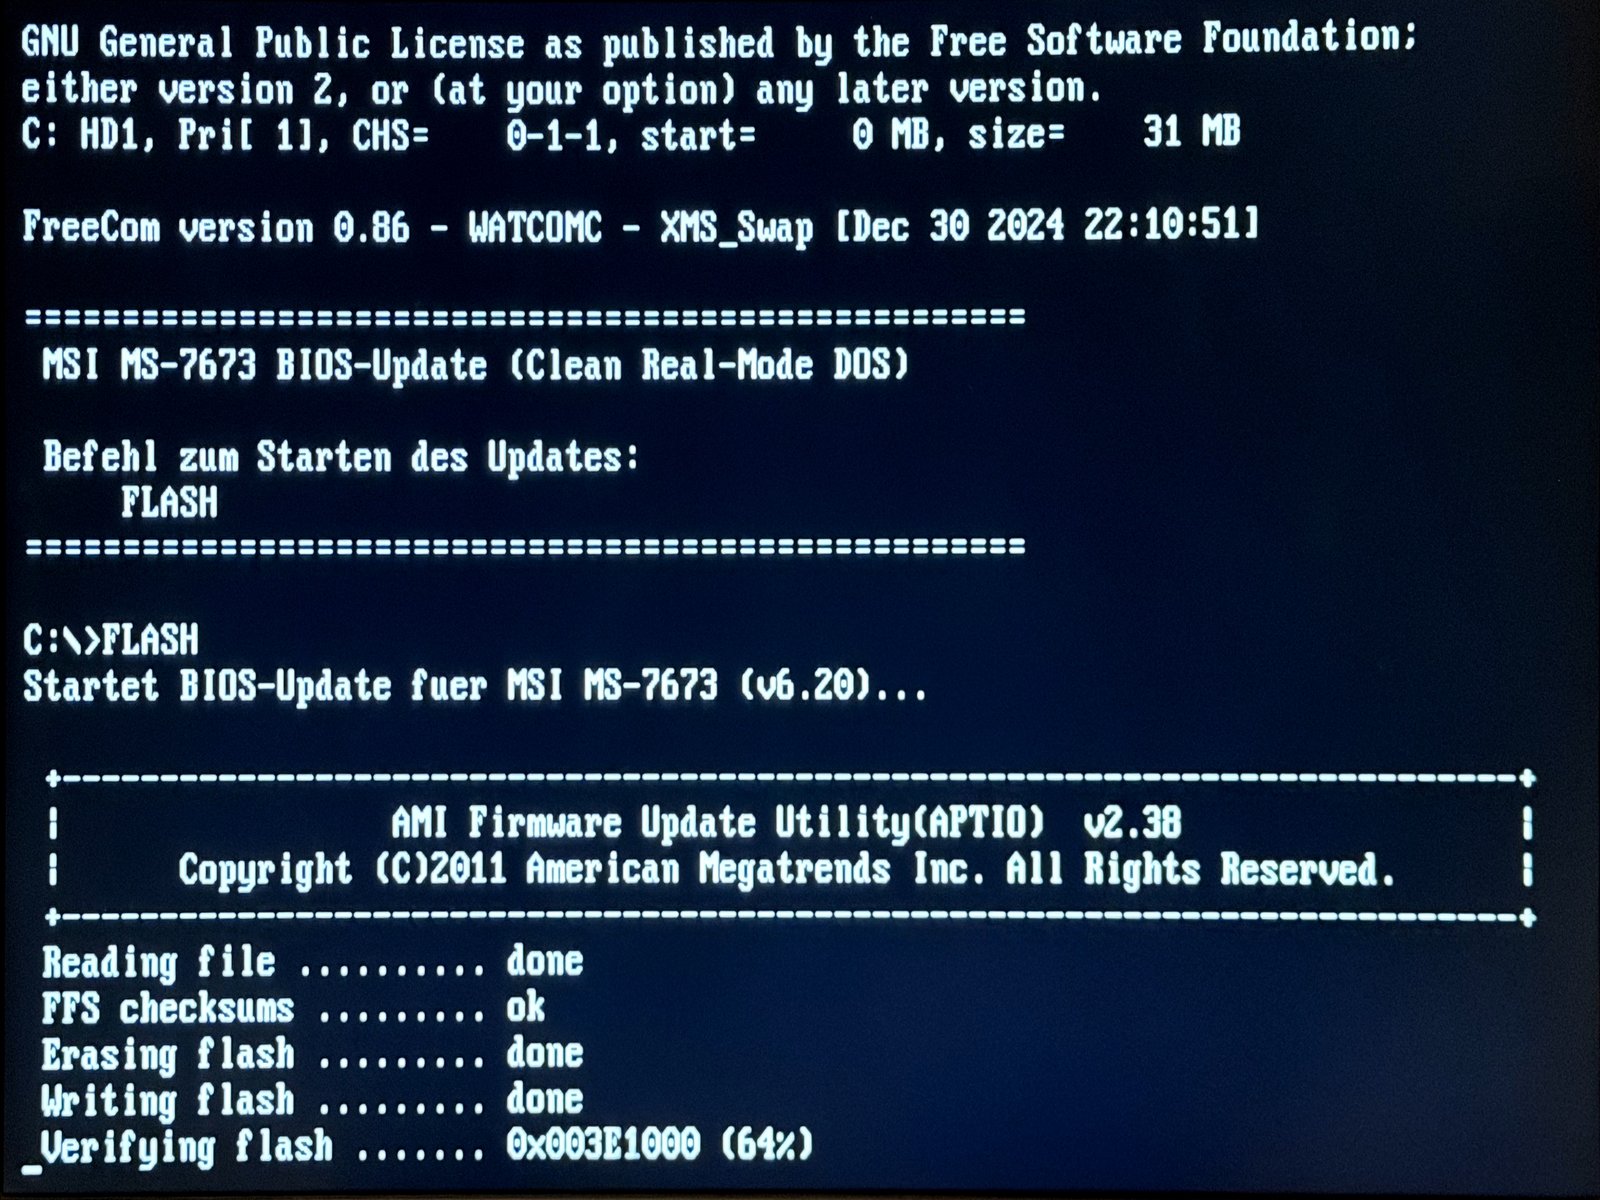
I typed FLASH and pressed Enter. Sure enough, this time the AMI utility initialized instantly and began working without any hesitation!
Reading file .......... done
FFS checksums ......... ok
Erasing flash ......... done
Writing flash ......... done
Verifying flash ....... done
Erasing NVRAM ......... done
Writing NVRAM ......... done
Verifying NVRAM ....... done
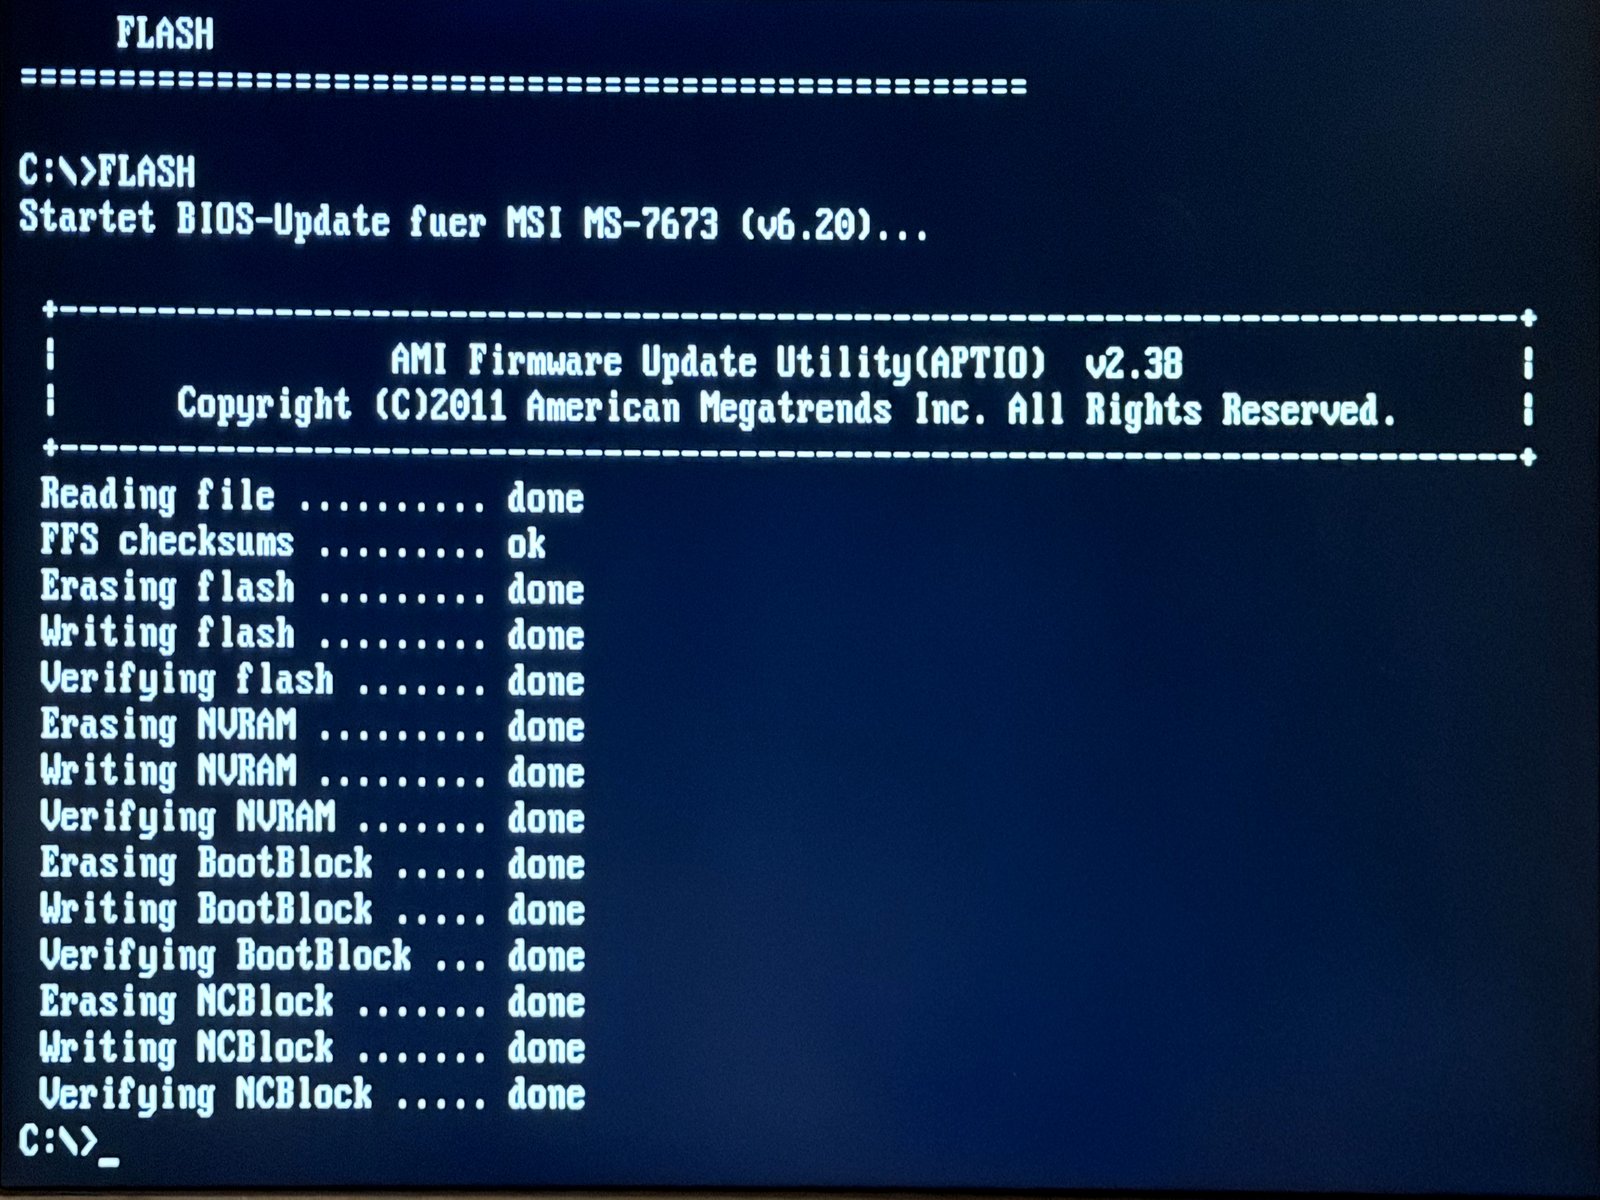
After about 90 seconds, the first stage was complete. Now came the golden rule: Leave the USB stick plugged in!
The system rebooted automatically, greeted by MSI’s distinctive red-and-black screen:
Updating BIOS ME 8.
Warning!! Please don't remove USB drive or shutdown system during BIOS update process.
Updating BIOS ME ........... 100%
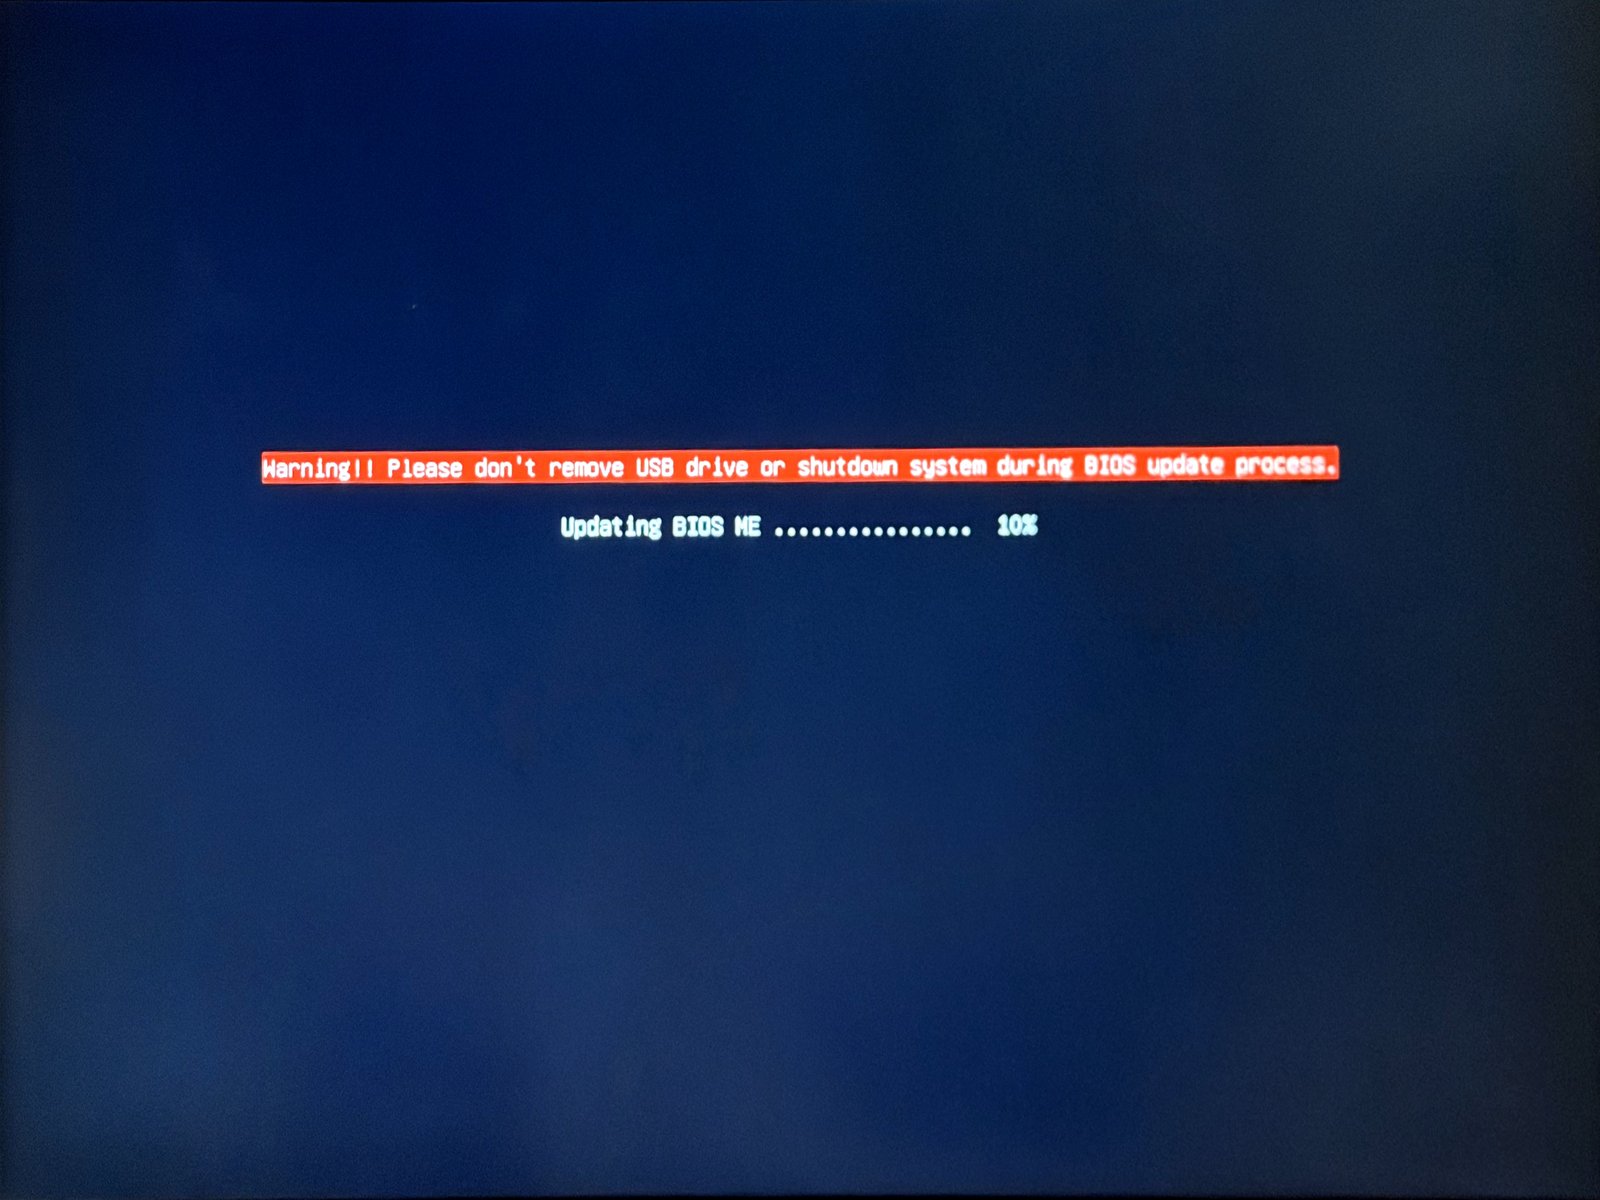
The Intel ME 8 firmware was finalized directly from the SPI chip. Following another automatic restart, pressing Del brought up the UEFI setup:
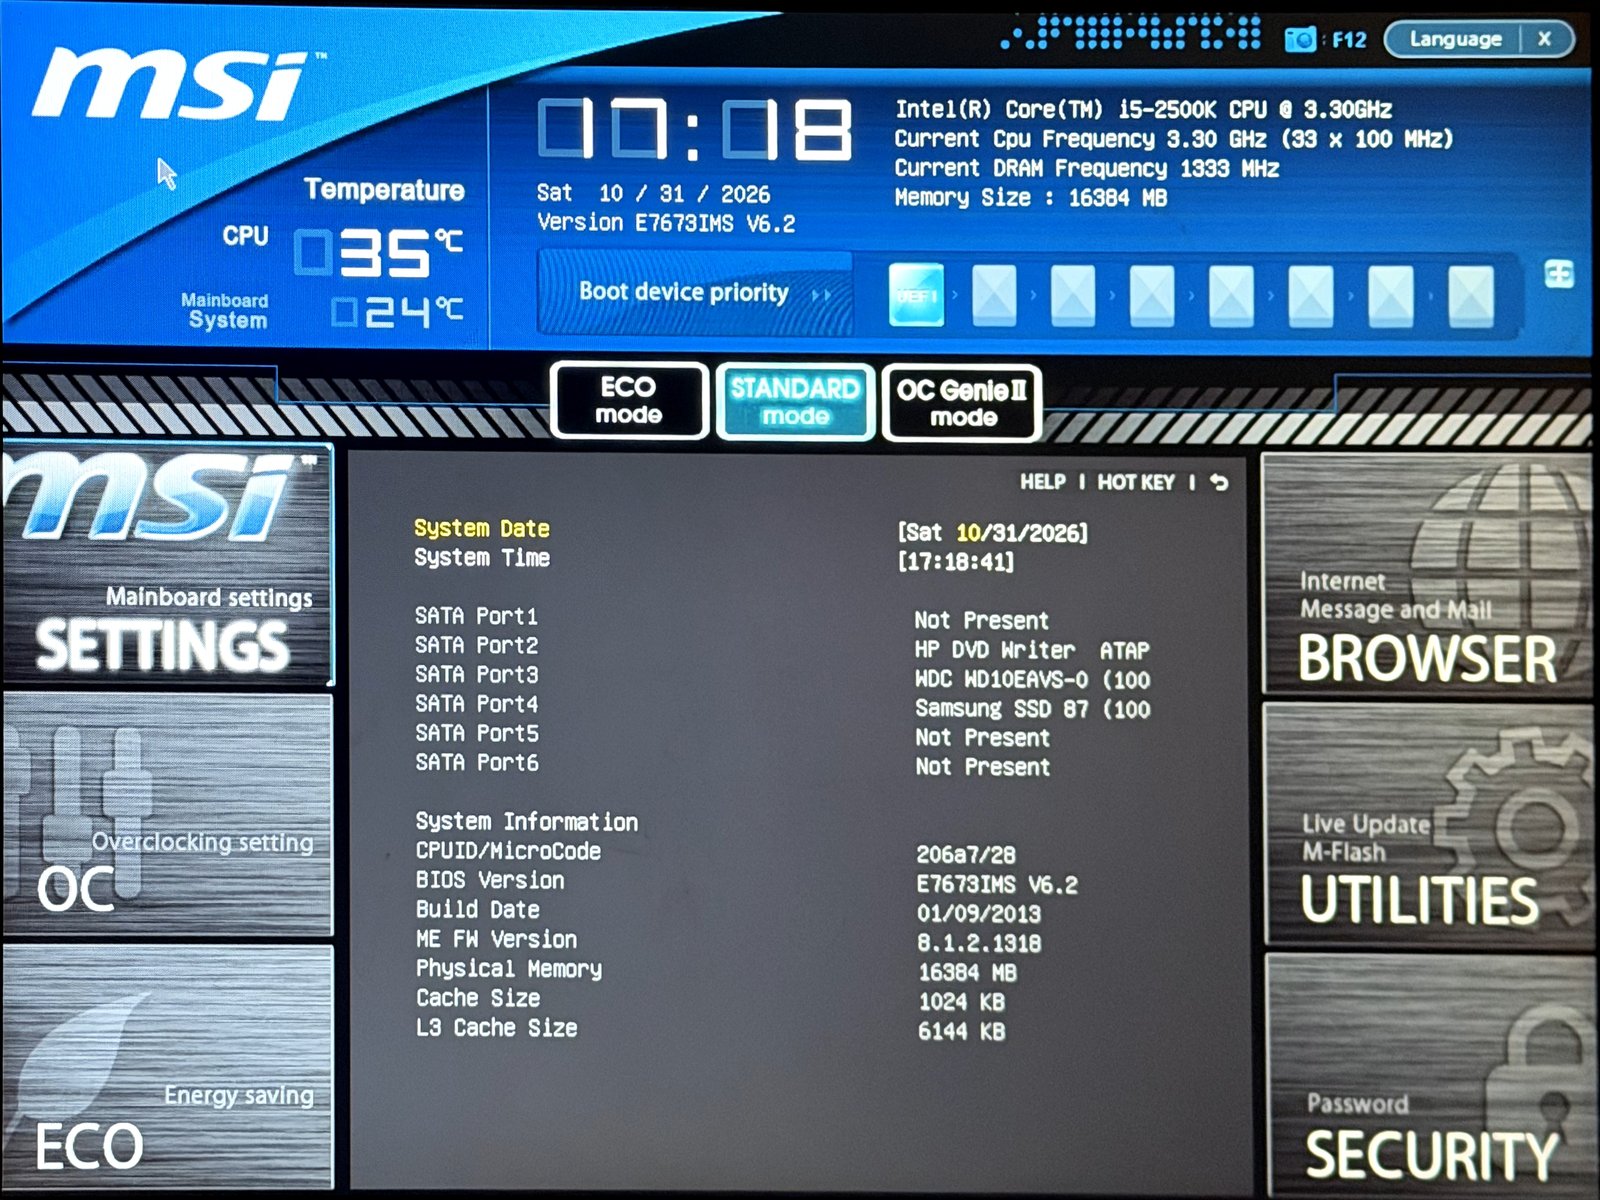
BIOS Version: E7673IMS V6.2—mission accomplished!
With the firmware update out of the way, it was time to boot back into Linux. There was an old relic lingering in /etc/default/grub:
GRUB_CMDLINE_LINUX_DEFAULT="reboot=pci"
Under the legacy 2.x BIOS versions of the Sandy Bridge era, the machine frequently hung during shutdown or ACPI resets. The reboot=pci parameter had been used to force a hardware reboot via the PCI bus.
With BIOS 6.20 and native UEFI boot enabled, this workaround has become obsolete: Linux now talks cleanly to the native EFI runtime services. I removed the parameter from the GRUB configuration, ran sudo update-grub, and MuttiLinux now boots, reboots, and powers off smoothly like a brand-new machine.
HIMEMX is AFUDOS’s arch-nemesis: When a DOS BIOS update freezes instantly upon execution, active XMS/EMS memory managers are almost always to blame. Always boot with DOS=LOW and no memory drivers.In the end, MuttiLinux is now enjoying fresh firmware, clean UEFI support, and no more dated kernel workarounds. A little adrenaline just comes with the territory when flashing a BIOS!
Lang verschollenen Tux gefunden
Der Geist der CLT2026 lebt! 🐧✨
Ich bin Frank. Ein Informatiker und Funkamateur aus Deutschland. Außerdem reise ich gern nach Japan.
By Frank Tornack,
Screen Burn-In
Glückwunsch! Deine Pixel sind jetzt offiziell eins mit meiner Website. 📺✨