Achievement Unlocked
Lang verschollenen Tux gefunden
Der Geist der CLT2026 lebt! 🐧✨
On July 4, 2026, I ordered a new smart telescope: the ZWO Seestar S30 Pro via Bresser.
I am writing this post diary-style over several days and will only publish it once the telescope is delivered and I have captured the first images. This article will document the entire journey from ordering to the “first light”.
The inspiration for this purchase came during my visit to the HAM Radio Friedrichshafen exhibition. Alongside the traditional amateur radio event, there was a parallel astronomy exhibition where I saw the smart telescope in person for the first time.
The smart telescope was ordered via Bresser – thanks to a 15% exhibition discount coupon, the final price was €643.55 including DHL shipping. I actually wanted to pay using my Crypto.com credit card to benefit from the 2% cashback. However, since it was the weekend, a bank transfer to top up the card wasn’t possible in time. Because I didn’t have enough liquid funds on it, I had to resort to a standard credit card in the end.
The first and most crucial point for me was that the Seestar S30 Pro works natively with FITS files – unlike the proprietary NEF files (Nikon Electronic Format) of my Nikon D5660.
Here are the key differences and benefits of FITS in daily astrophotography:
Although the telescope is still on its way, today I already installed the first software packages required for future astrophotography image processing on my Linux system. Using the AUR helper pikaur2, I set up siril3 (for stacking and basic processing), graxpert-bin4 (for gradient removal), and starnet2-bin5 (for star removal - which is unfortunately closed source now):
pikaur -S starnet2-bin graxpert-bin siril
Afterward, I configured the paths to both external programs directly in Siril’s settings so that Siril can invoke them during processing:
/usr/bin/starnet2/usr/bin/graxpert-binu/sjmoodyiii (link to comment) for kindly hosting sample files on the internet, which made testing possible.With the arrival of the new smart telescope, it is also time to clear some space. I plan to pass down my two old telescopes from my childhood days to my cousin’s children. This way, they won’t gather dust in the closet anymore and will hopefully inspire a new generation to look up at the stars and explore astronomy.
After the DHL delivery agent handed over the package today, I immediately went to unbox it. Unlike some other models, the Seestar S30 Pro does not come with a classic hard shell case (hardcase). Instead, it includes a carrying bag that feels very premium. A very practical detail: all the accessories—including a compact solar filter with a magnetic mount (which I haven’t tested yet) and a small tripod—were already neatly packed and organized inside the bag.
As the first step, the telescope was plugged in to charge the battery. Meanwhile, the download of the accompanying Seestar app is already underway. Weighing in at a substantial 1.3 GiB, the app is a real heavyweight. On my DSL 7000 connection, this requires some patience and is also a critical detail to keep in mind if you plan to set up the telescope abroad or on the go using mobile data.
The next step after charging is connecting the telescope to the smartphone. To do this, it is necessary to create an account in the app. Once connected, you can change the default Wi-Fi password of the Seestar (a highly recommended security measure) and directly update the firmware to the latest version. As soon as that is done and the weather plays along, it will be time for the “first light.”
I was incredibly lucky: on the very evening after delivery, the sky cleared up completely, offering perfect conditions for the “first light.” At 11:10 PM, I headed outside with the fully charged Seestar.
Since I don’t own a tripod head with a 3/8-inch thread yet, I used my existing Rollei tripod directly without a head, mounting the telescope straight onto the tripod’s base screw. Compared to my Nikon D5660, the Seestar S30 Pro is a relatively large and bulky device. Screwing it onto the bare tripod thread felt a bit awkward and unsafe at first—it was tricky to keep it balanced while turning the telescope body. However, once the thread was fully tightened, it sat extremely stable and secure.
Before starting, I switched the Seestar app’s language to English. The German localization feels a bit clunky and inaccurate in several places. Since my English is strong, the English user interface is much cleaner and easier for me to use.
My first target of the night was NGC 7000, the famous North America Nebula in the constellation Cygnus. While the telescope was slewing to the target and preparing the capture sequence in the background, the app showcased one of its coolest features: the built-in AI started sharing interesting facts and background details about the nebula. Having this audio/text companion completely transforms the waiting time during alignment and calibration, making the stargazing experience feel highly interactive.
For comparison, here is the JPEG image automatically processed and stretched by the Seestar app, exactly as saved on the smartphone:
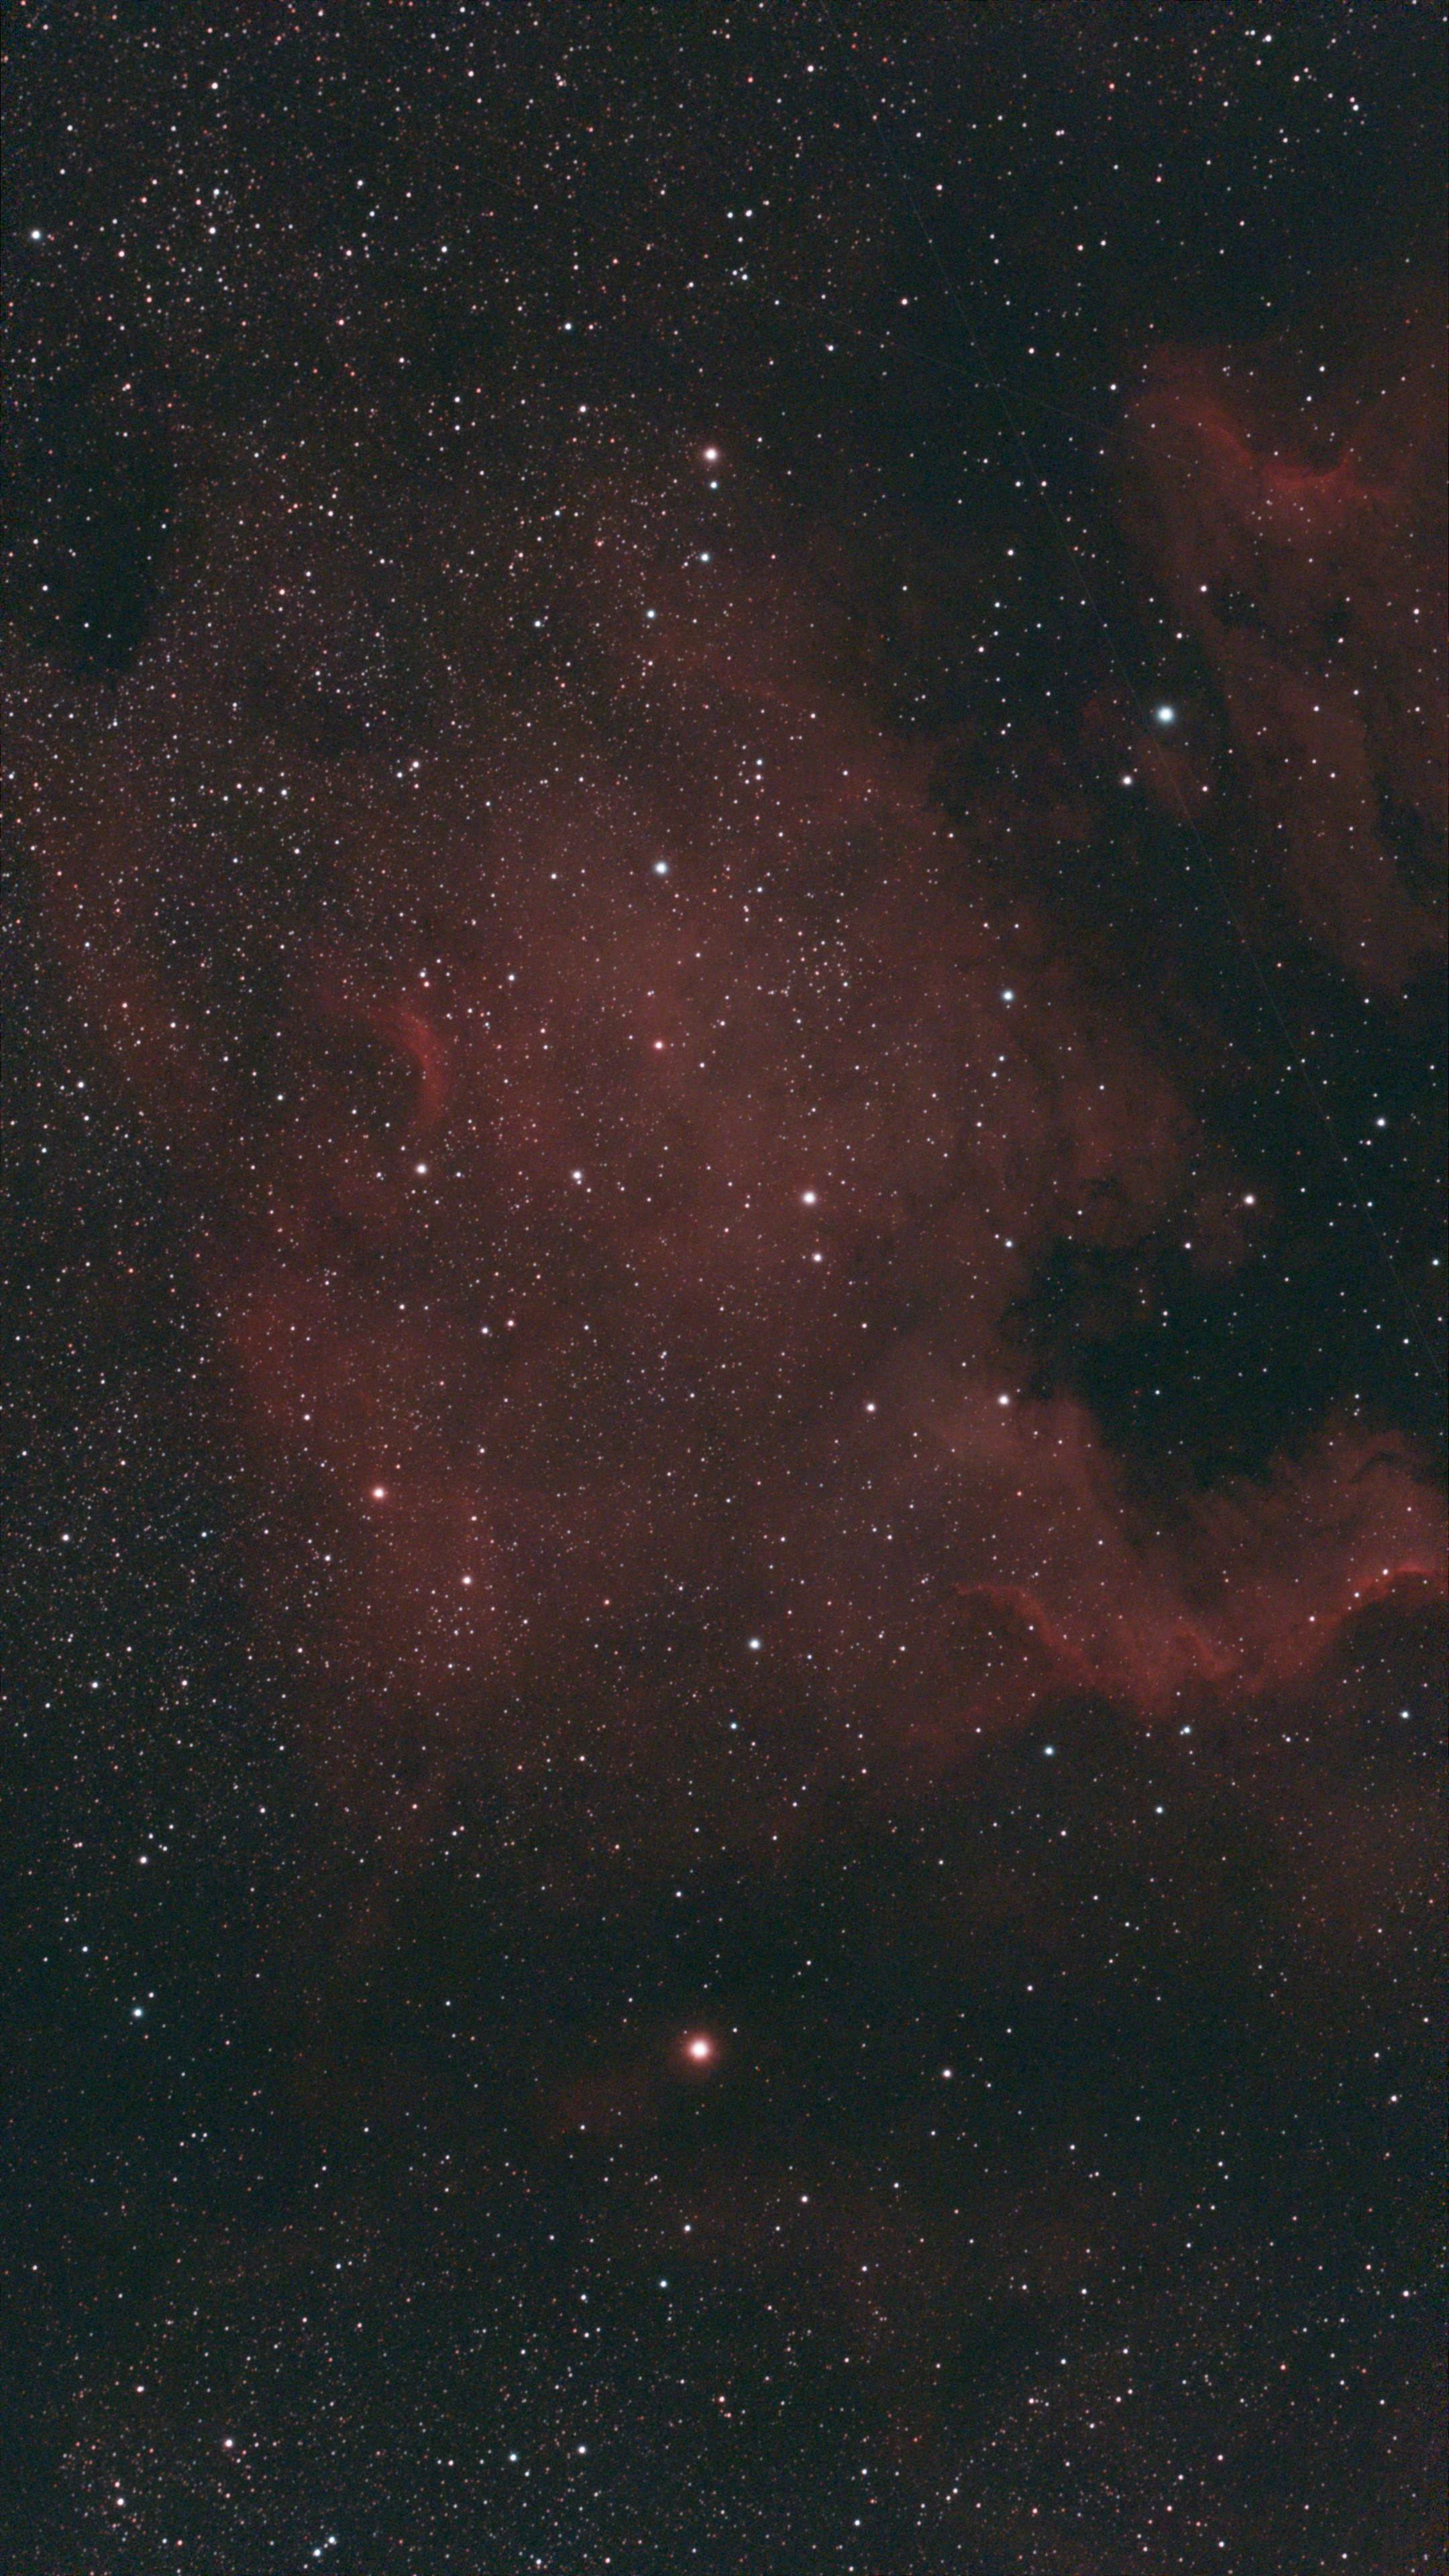
And here is the finished stacked raw image as a FITS file directly from the telescope, which can be viewed and adjusted using the interactive FITS viewer:
Originally, I had only planned to capture a single test image during this first night to check how the tripod, telescope, and app worked together. However, the observation process and the simplicity of the system were so much fun that I just couldn’t stop. On a whim, I decided to start a second capture.
My second target of the night was Sadr (Gamma Cygni), the bright star at the center of the constellation Cygnus, which is surrounded by the vast emission nebulae of the Sadr region (IC 1318). Once again, slewing and centering went flawlessly.
Here is the processed JPEG image of the Sadr region from the app:
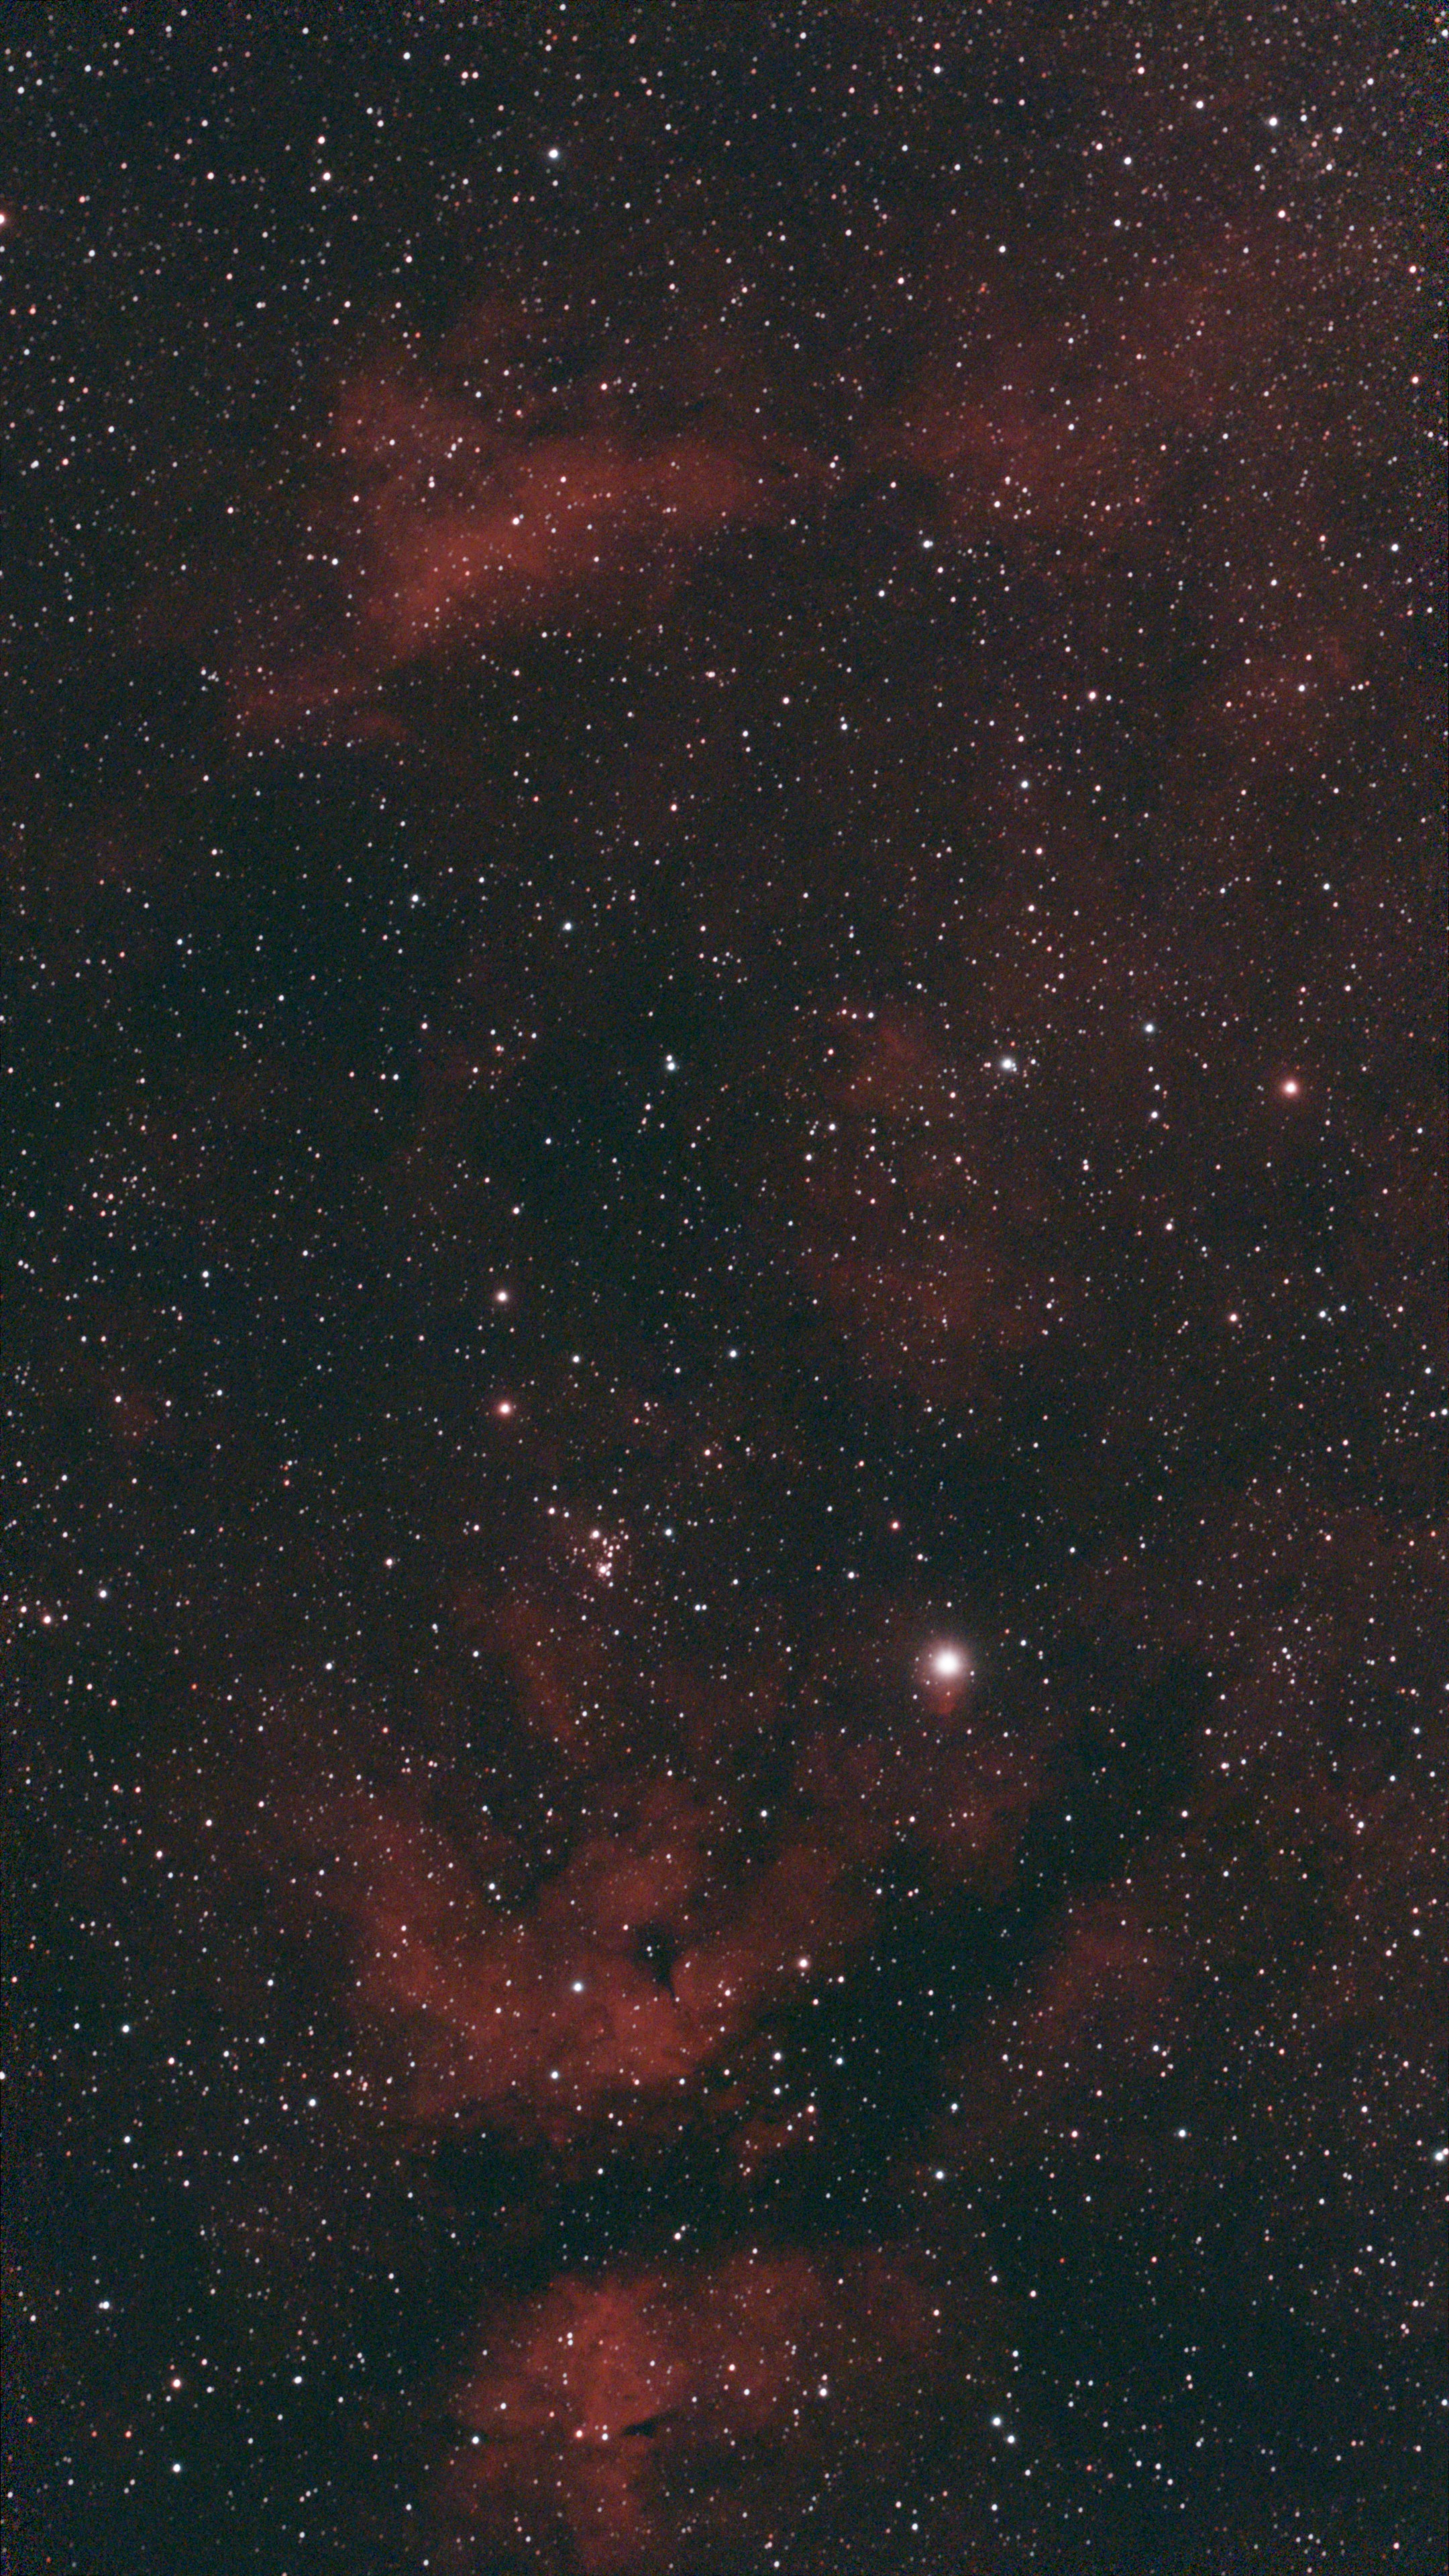
And here is the raw stacked FITS image for comparison:
At the very end of the night, just as I was about to pack up, curiosity got the better of me: I really wanted to try out the new mosaic mode of the Seestar S30 Pro.
For this test, I chose one of the brightest stars in the summer sky: Vega in the constellation Lyra. What makes this image special is that it was not captured with the main telephoto lens, but with the integrated wide-angle camera (Sony IMX586 with a focal length of 5.96 mm).
The telescope captured a total of 54 frames at 10 seconds each (amounting to 9 minutes of total exposure time). The resulting FITS file has a resolution of 4175 x 3777 pixels. Since the wide-angle camera’s sensor natively has a different aspect ratio, this almost square format clearly demonstrates that the software successfully stitched multiple individual frames into a mosaic while the telescope swept the area around Vega.
Here is the stitched wide-angle JPEG image of Vega from the app:
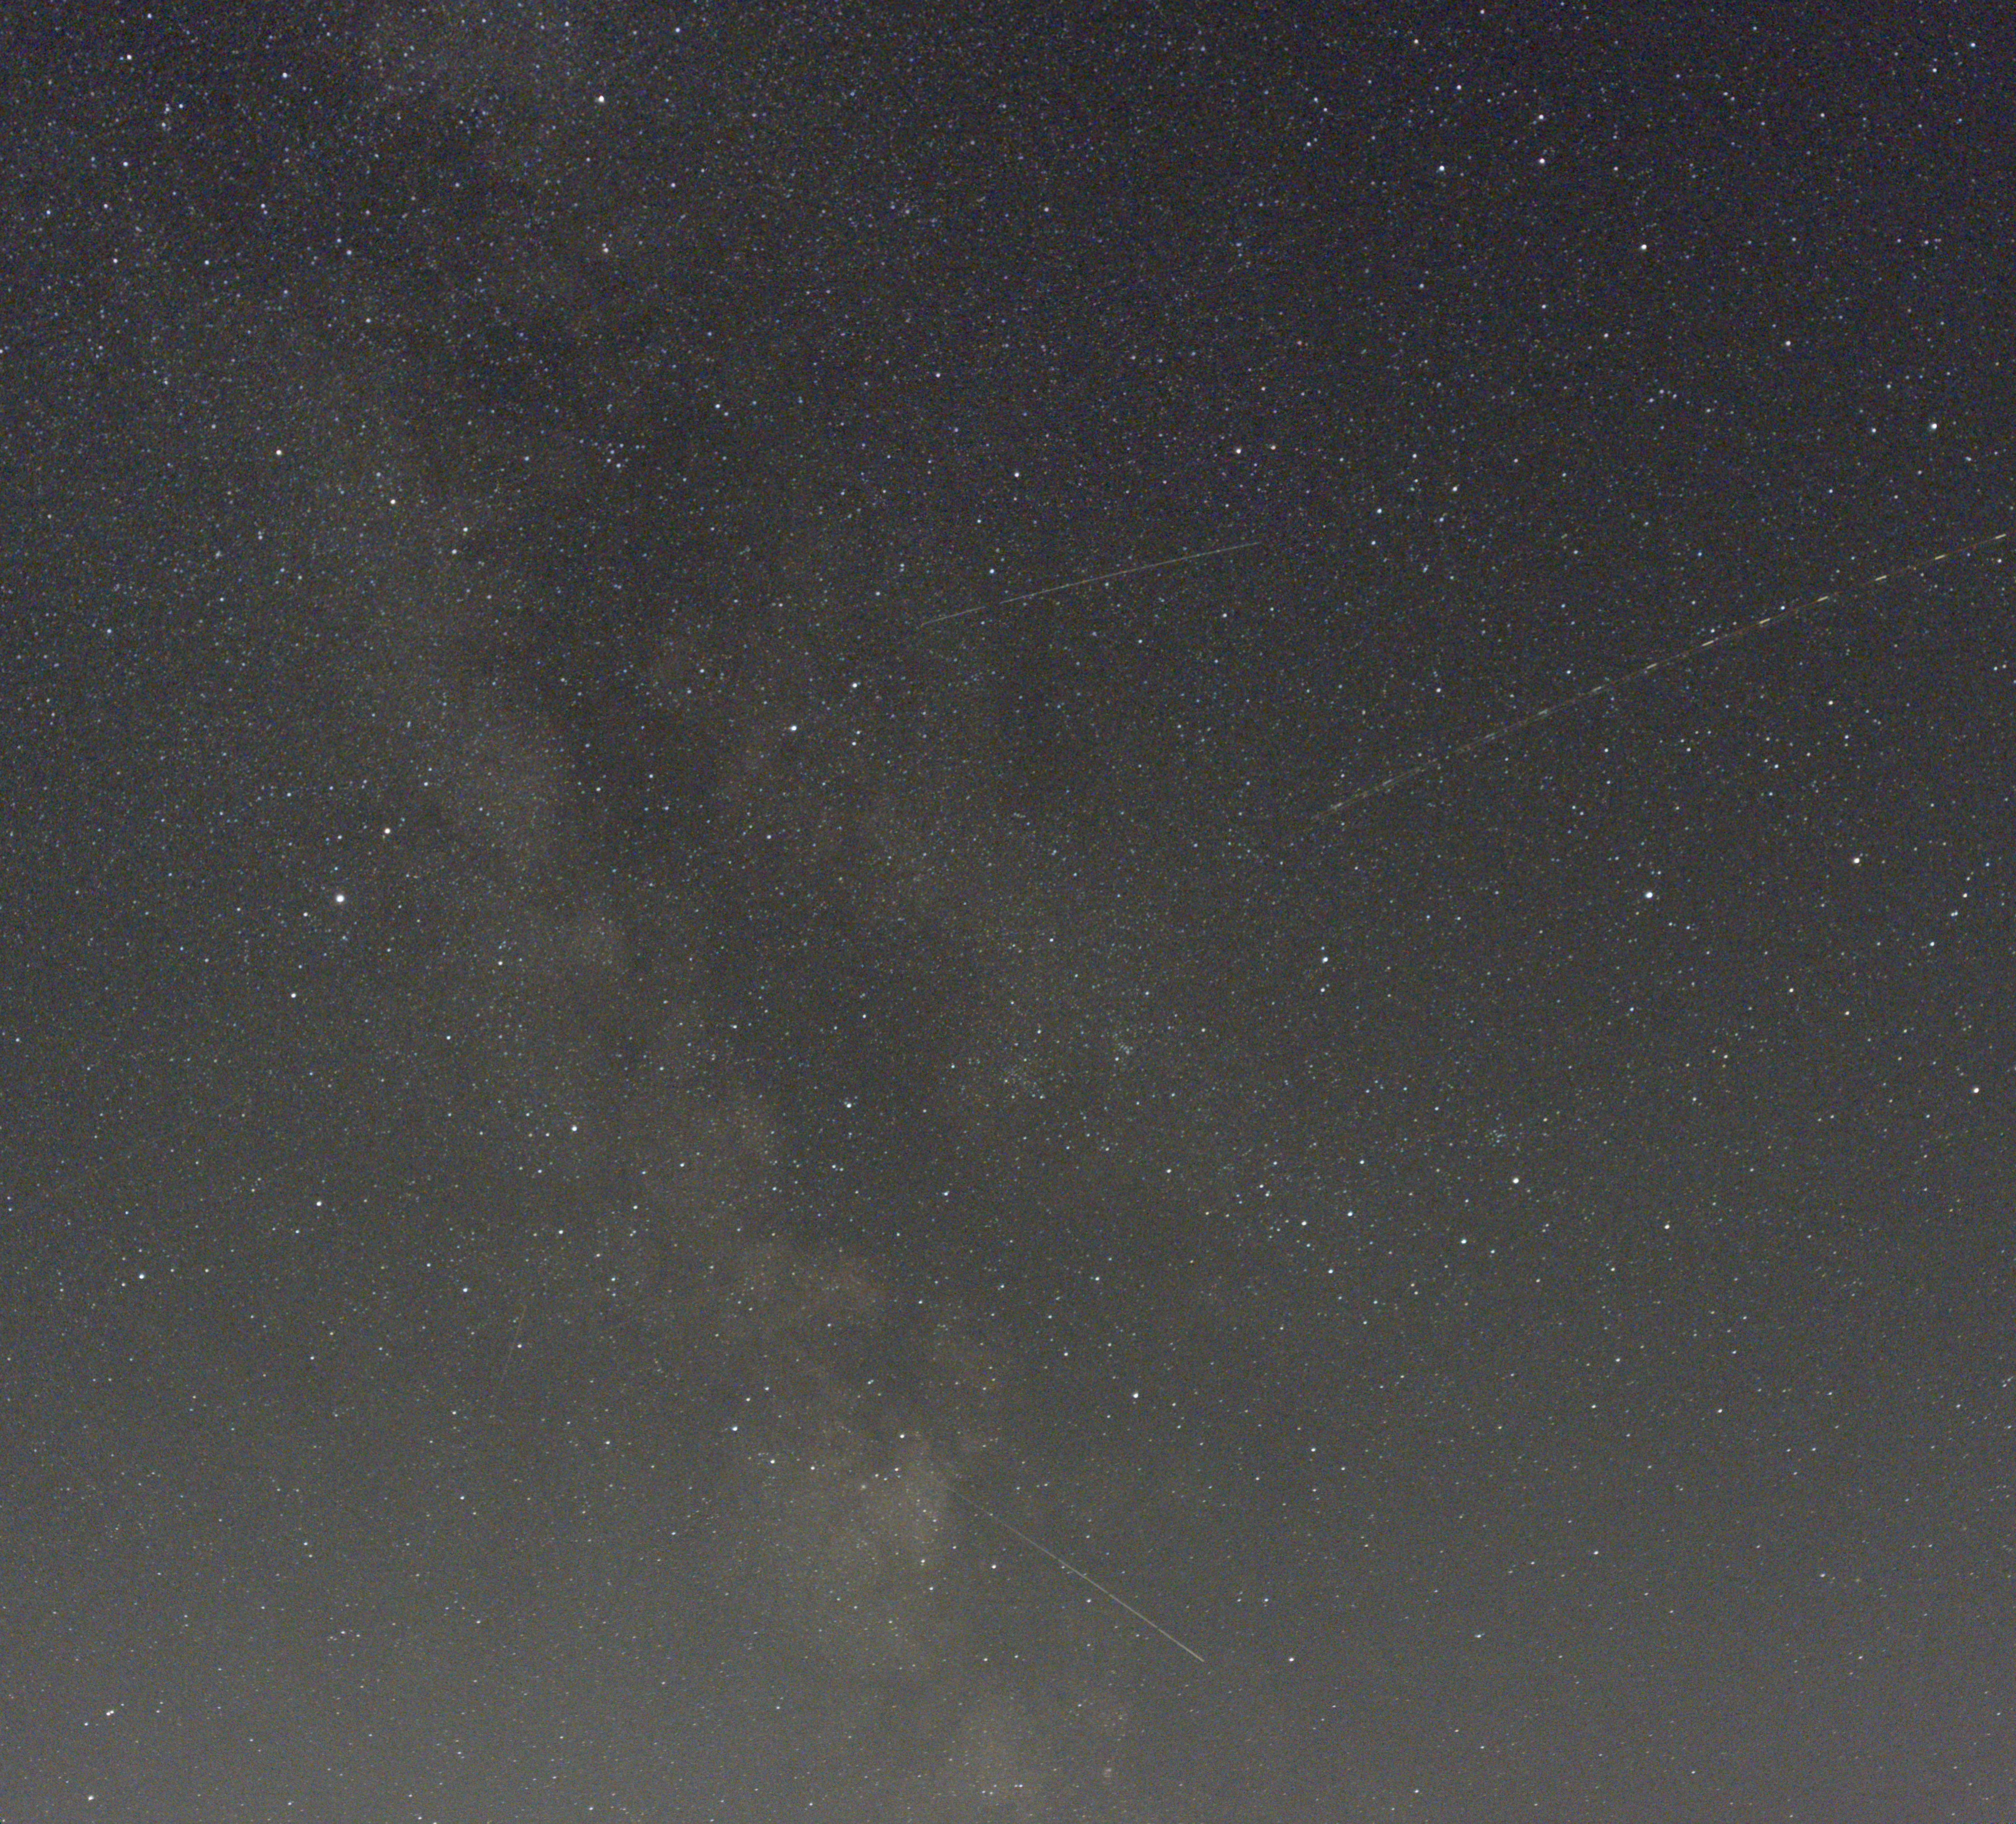
And here is the stitched FITS image for interactive comparison:
Around 1:30 AM, it was time to pack up. Similar to the setup, unscrewing the telescope directly from the tripod thread was a slightly nerve-wracking process. Due to the bulkiness of the Seestar S30 Pro, there is a constant fear of dropping the device while turning it off the bare 3/8-inch base screw. A proper tripod head will definitely be my next purchase to make this process much safer.
Additionally, while packing up, I noticed that the material of the included carrying bag strongly attracts the evening humidity. The bag was noticeably wet on the outside. It is definitely a good idea to let the telescope and accessories air out briefly at home so that no moisture gets trapped inside the bag.
In practical use, two points in particular surprised me very positively: the battery life and the range of the direct Wi-Fi hotspot:
I did not explicitly pay attention to any dew on the front lens during this first night—but given the high humidity and the wet carrying bag, this will certainly be an important point to monitor in the future.
Both the North America Nebula (NGC 7000) and the region around Sadr (IC 1318) belong to the class of emission nebulae. The characteristic red glow of these regions has a fascinating physical reason:
Since hydrogen is by far the most abundant element in the universe, almost all classic star-forming regions and emission nebulae glow in this beautiful red hue in astrophotography.
Anyone comparing the finished JPEG on their smartphone with the FITS file in the interactive FITS viewer will notice that the red color in the viewer appears significantly weaker and fainter. This is not a bug, but is due to technical reasons:
fitsviewer.js) automatically balances the RGB channels to neutralize the sky background. In contrast, the mobile app uses sensor-specific color matrices to selectively boost H-alpha red.siril: error while loading shared libraries: libopencv_calib3d.so.413: cannot open shared object file: No such file or directory), I haven’t been able to perform the manual stacking and processing on my laptop yet—so the FITS images here are based on the stacked images automatically generated by the telescope. It is only during manual processing (stretching, background extraction, and color saturation) that you pull the full, vibrant red out of the data in a controlled way.Now it’s your turn: Which celestial bodies should I target next with the Seestar S30 Pro? And what do you prefer when viewing – the interactive, scientific raw FITS data directly in the browser, or the pre-processed, vibrant JPEGs? Let me know in the comments below!
Lang verschollenen Tux gefunden
Der Geist der CLT2026 lebt! 🐧✨
Ich bin Frank. Ein Informatiker und Funkamateur aus Deutschland. Außerdem reise ich gern nach Japan.
By Frank Tornack,
Screen Burn-In
Glückwunsch! Deine Pixel sind jetzt offiziell eins mit meiner Website. 📺✨